
I was organizing some bills and receipts and decided I wanted to make the folders a little prettier, so I covered them with vintage sheets. It is a super-easy-instant-gratification project, and here is how you do it!

First, you need to choose your fabric. Fat quarters are the perfect thing to use because if you measure and cut carefully, you have just enough fabric for two folders.
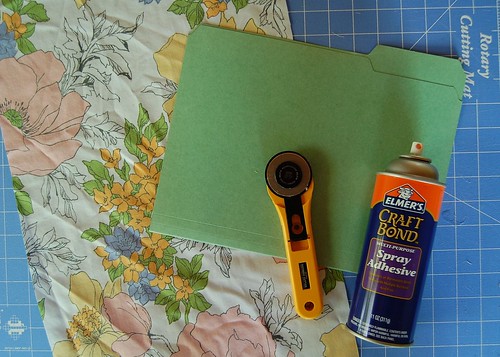
Assemble the rest of your materials: a file folder, spray adhesive, and either scissors or a rotary cutter and mat. As you can see my fabric was pretty wrinkly to start with. You can press your fabric if you like, but it is not necessary. All of the wrinkles will smooth out when you attach it to the folder.
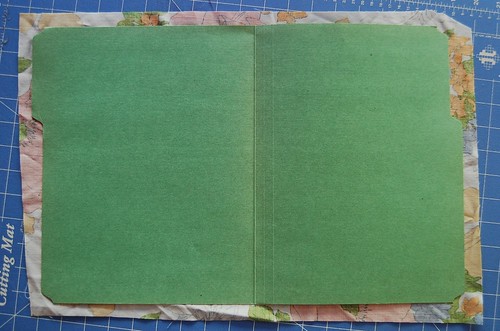
Trim the fabric so that it is slightly larger than the folder all of the way around. The less fabric the there is around the edges of the folder the more careful you will have to be when adhering it. Now set the fabric aside and apply a generous, even coat of spray adhesive to the OUTSIDE of the folder. Make sure all of the edges are thoroughly covered with adhesive.
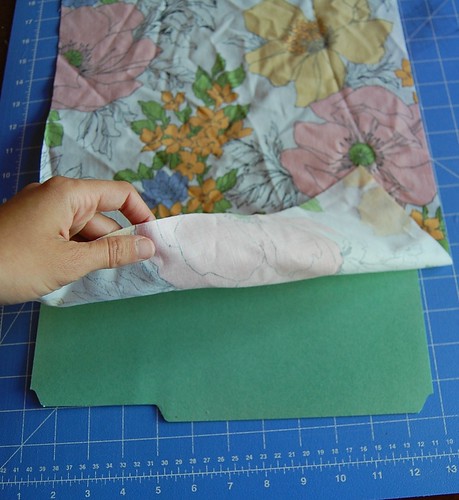
Put the folder (sticky side UP!) back on the table and gently place the fabric on top. It is best to start at one end and gently move to the other end.
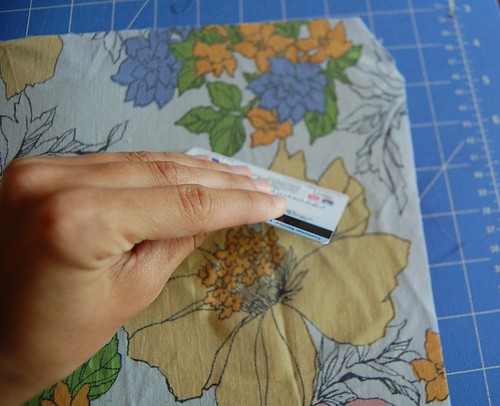
Using a credit card, start at the center of the folder and gently press all of the air bubbles and wrinkles to the edges of the fabric. By the time you are done you should have a nice, smooth surface.

I then ran a small rolling pin over the whole thing (paying special attention to the edges) a few times just to be certain that the fabric was nicely adhered all over.

Last, flip your folder over and use either your rotary cutter or scissors to trim away the excess fabric. It can be a little tricky around any curved edges, so you might want to use some tiny little scissors.
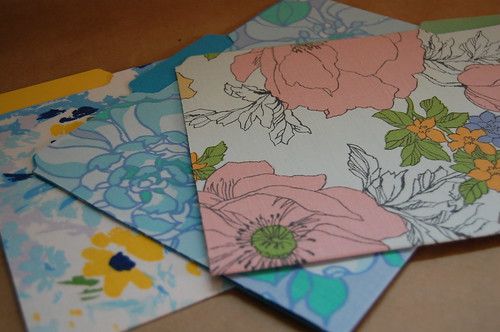
TA DA! Now you are finished with your folders and it's time to stop procrastinating and get back to organizing those bills. :)






19 comments:
Love those files!!! Even someone as uncrafty as I am could do that. And you know how much I love to organize! Maybe I should make some for Sarah too.
yes, amy! they would be a perfect craft for you. i do know how much you love to organize!
these are AWESOME! How fantastic of you to make them AND post a tutorial!
happy weekend to you! xo
thanks, barb! hope your weekend is great, as well!
I love that idea. Nice job and great tutorial! Thanks!
i love this! i'm now on the hunt for some amazing vintage fabric like yours. great tutorial!
Eeks! I love all of your recent projects! You inspire me so much, my dear. :)
Love those fabrics!
Fantastic tutorial.
thank you so much jessie!
rachel--that sheet i used in the tutorial photos is my absolute favorite ever. i love it!
What a great idea.
WOW! Katherine, I just came across your blog and WOW! I love it! You do doing some amazing things on here, so talented! {a fellow Northern Cali blogger here} :) I hope you are enjoying your weekend!
What a great idea, I love this blogging worl, so many talented people out there.
I'm new to blogging pop over and say hello.
Karen
this is a fantastic project and these file folders are SO much cooler w/the fabric. nice work!
What a great idea!!! They turned out great! Very clever
I just saw that this wonderful project was featured on d*s! What a great day and a great idea!
These are so beautiful, what a great idea! Good job!
Hello! I just found your blog today and I'm very glad I did! I'm loving your tutorials and I look forward to seeing more in the future! Take care,
Karen
I WANT YOUR FOLDERS! That fabric is perfection.
LOVE IT!
These look like the Liberty file folders I just saw at Target, but better, thanks gfor sharing, I love spray adhesive!
Post a Comment