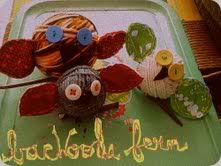
This year I want to keep things organized, and with that in mind I have been affixing labels everywhere I can. I am using these labels in the kitchen, but they work anywhere!
For this project you will need the following MATERIALS:
*cute fabric
*fusible web
*adhesive back fabric sheets (i used these)
*embroidery floss (in a color that nicely contrasts your fabric)
and these TOOLS:
*embroidery needle
*scissors
*iron, ironing board and press cloth
Step 1:


Embroider you word or design.
Step 2:


Following the manufacturer's instructions, adhere your fusible web to the back side of your fabric label. I used a press cloth in order to protect my embroidery.
Step 3:

Remove paper backing to reveal sticky stuff.
Step 4:


Position fabric label on fabric paper and fuse with your iron. Again, I used a press cloth here to protect my embroidery (not shown in photo).
Step 5:

Cut out your label.
Step 6:


Remove paper backing and affix label to your clean, dry surface. Make sure to gently push and bubbles out toward the edges.
All done!
P.S. If you have any extra little scraps of sticker-backed fabric you can cut them into shapes to make stickers.

They are especially cute for scrapbooks and notecards.


8 comments:
What a great Idea! Those are so cute and I love that you made stickers too! Your tutorial was very easy to follow! You should think about doing some on line classes!
( : Sheri DeBow!
wow. wow. wow. I am beyond impressed! I may have to share this on my blog...great crafting!
ooh super cute! what type of stitch did you use for the lettering?
i used a chain stitch. i'm not great at embroidery, but i definitely want to experiment some more with it!
Wonderful! I have big glass Jars I would love to use for my sugar and flour and this would be easy for me to make since I do some cross stitch. If you want to follow a pattern for the letters, try waste canvas. But your's looks great as is, mine.. I would need the help of the waste canvas!
Thanks for posting this!
Elise
These are so cute, I couldn't help but link to them on my weekly roundup. Thanks! :>)
ciao.
many thanks for tutorial..it's clear :-)
ciao
ciao
annapaola
tuscany
italy
Oh my goodness, how cute! I love this. I'm definitely going to make some of these! Fabulous tutorial.
Post a Comment