


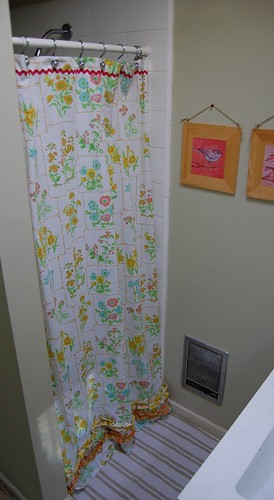


Cute shower curtains can be hard to find, especially if you are on a tight budget. One can easily be made, though, using vintage sheets! These instructions are for a standard 74"x74" shower curtain, although I made mine a little smaller to accommodate my shower.
For this project you will need:
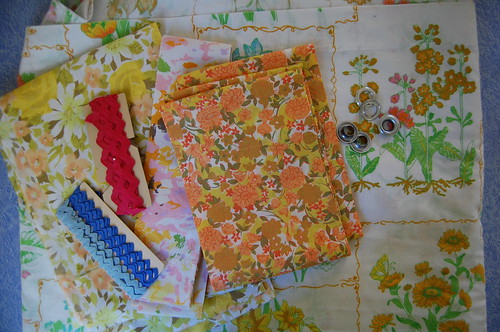
(1) piece of a vintage sheet, cut to 75"x75"
(2) strips of vintage sheets (in different colors) cut 6"x90" (you may need to piece
together two strips to get one long enough) for the ruffles
(12) grommets. I used one of these to apply these. If you prefer, button-holes can be used instead of grommets.
rick-rack for embellishment (mine is vintage)
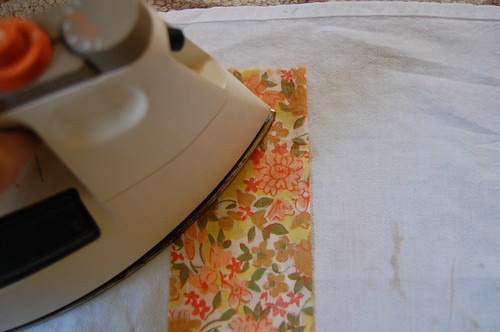
First, we will make the ruffles. Press each of your 90" strips in half length-wise, with the wrong sides out.
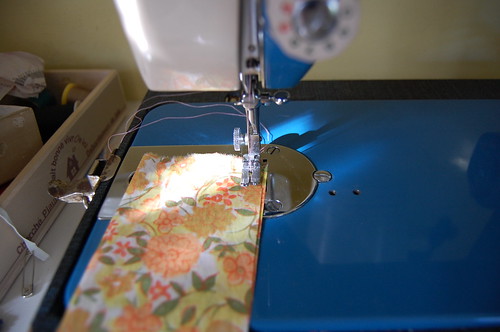
Stitch the raw edges shut to form a tube.
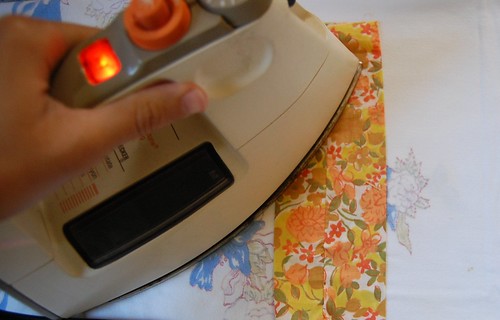
Turn the tube right-side-out and press it, with the seam running down the middle of one of side.
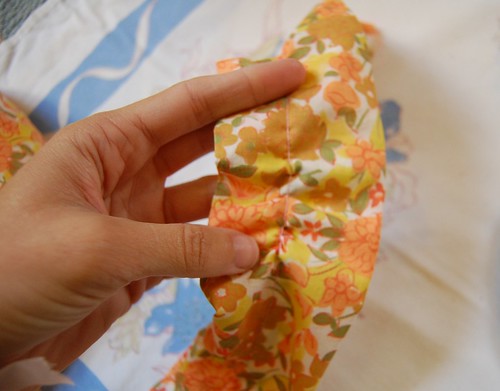
Run a loose basting stitch down the middle of the tube, using the existing seam as a guide. Don't back-stitch at either end! Gently tug on the top thread, and the seam will start to pucker. Carefully do this along the entire length of the tube. Once finished, you have your first ruffle made! Repeat the previous steps to make your second ruffle strip.
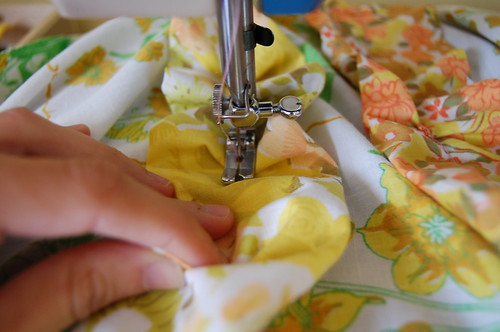
To attach the ruffles to the curtain panel, pin the ruffle strip in place and carefully stitch it, gently gathering up the fabric as you go. If you have a ruffle foot attachment for your sewing machine this step will be easier. If not, though, no big deal. Just pay careful attention to what you are doing and please watch your fingers!
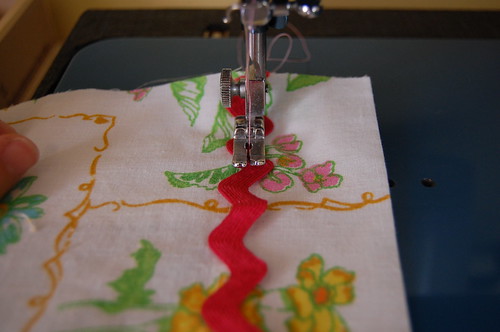
Once your ruffles are attached to the bottom of the curtain, stitch a row or two of rick-rack across the top.
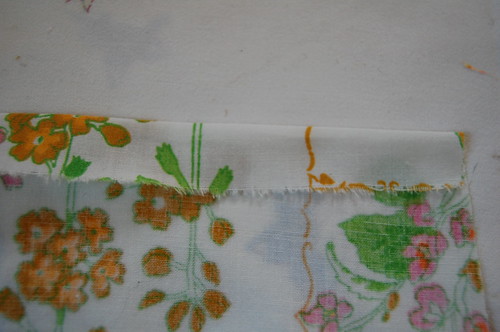
To hem, press in the seam one half inch (toward the back of the curtain)
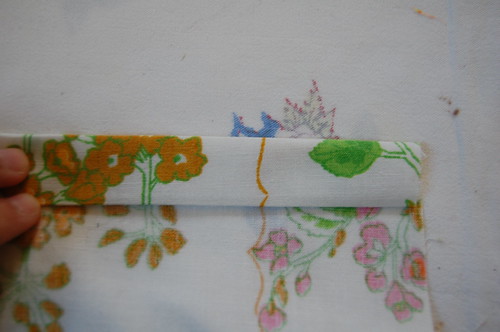
and then another half-inch,

pinning as you go along to keep everything in place. Try to use the already hemmed edges of your sheet to your advantage and save yourself some work! I used one for the top edge of my curtain.
Once your curtain has the embellishments attached and is hemmed on all four sides, you are almost done! The last step is to attach the grommets.
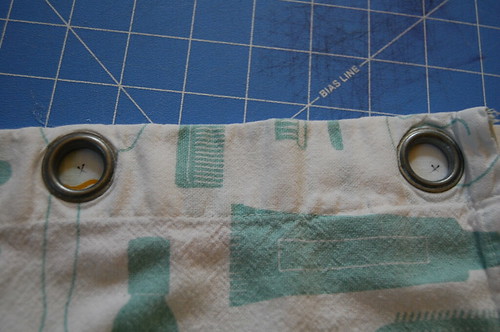
Use your old shower curtain or your curtain liner to mark on the new curtain where the grommets will go. This distance is 6" apart from center to center.

Using the marks you just made, cut a hole and follow the package instructions to attach each of the 12 grommets. Once your grommets are attached your curtain is ready to hang!


21 comments:
That turned out soooo cute. Great tutorial and I love the ruffles at the bottom.
This is so awesome! I love it!!!!
Super Cute! I love the fabric combos.
i love vintage sheet projects (probably because I feel the need to buy every decent sheet i find.)
I love it! Our shower curtain is from Target but has the same look with the ruffles at the top instead of the bottom. All white. When it gets ruined, I'll know how to replace it!
Great tutorial, Katherine!
This is a great idea Kat! I've been trying to find a shower curtain, but I have a vintage sheet I'd way rather use! Thanks & I wanna feature your tutorial on FN... is that okay?
LA :)
i love love love this. i was browsing google for instructions on how to make a new shower curtain for my kids bathroom and this is perfect. i hope i have a whole sheet that i can use. tomorrow morning first thing i am going to raid my stash
This is such a great idea!! I have a whole stack of vintage sheets just waiting for a project like this!
I posted a link to your tutorial on Craft Gossip Sewing:
http://sewing.craftgossip.com/tutorial-shower-curtain-from-vintage-sheet/2009/11/02/
--Anne
thanks so much, anne!
Wow, I love this! I'm going to start hunting the thrift shops now. We're renovating our bathroom, hopefully by the time it's done I'll have found the perfect sheet! I just came across your blog via the link on CraftGossip. I'm so glad I did, this curtain is fabulous! I would also love to link to it if you didn't mind.
sure thing, rachel! thanks so much!
Very cute! I included it on my blog for Tutorial Tuesday since it would make a great holiday gift. :)
http://www.lisaashby.com/2009/11/tutesday-handmade-holiday-gifts/
thanks so much, rachel!
hugs!
you have NO IDEA how much i love this tutorial! i'm always looking for cute shower curtains, and it's impossible to find one. can't wait to try this out!
oh my goodness that is cute! i love the orange sheet so much i can't stop thinking about it's perfectness!
THANKYOU! for this tutorial. I cant find a shower curtain i like so we just have a clear one. I cant wait to make one now! YAY!
i raided my stash and found just what i needed to make this. i am so thrilled with how it turned out. thanks for sharing otherwise i would never have known what measurements to use. i just posted pictures on my blog this afternoon.
http://leslie-fluffnonsense.blogspot.com
Thanks for share good post. Useful information, keep it up. I like your post.
Love it, super cute! I am starting a blog dedicated to vintage sheets and would love to feature your tutorial!
I used to have that exact same sheet as a fitted sheet. I loved the pattern and wore it to death with using it on the bed and washing it. Now I wish I had made a shower curtain to match it.
You know you're getting old when.....things you had in your 20's are now called "Vintage"!
Do they sell these for vintage showers? That would be sweet. I love that old school look.
Post a Comment